Showing posts with label MAC. Show all posts

Thursday, 11 June 2015

Smouldering Purple Eye

As of late I've found myself trying to move away from my comfort zone of browns, golds and neutrals and attempting to infuse a little bit of colour into my makeup routine. A good way I've found of doing this is to pick a colour that's not so out there, purple in my case and introduce it as an element of your look rather than the main event.

For this look I decided to base my look on rose-golds and accent the look with purples. This is a little bit different for me but still not completely out of my comfort zone. I'd love to have the courage to go for something crazy like this. 
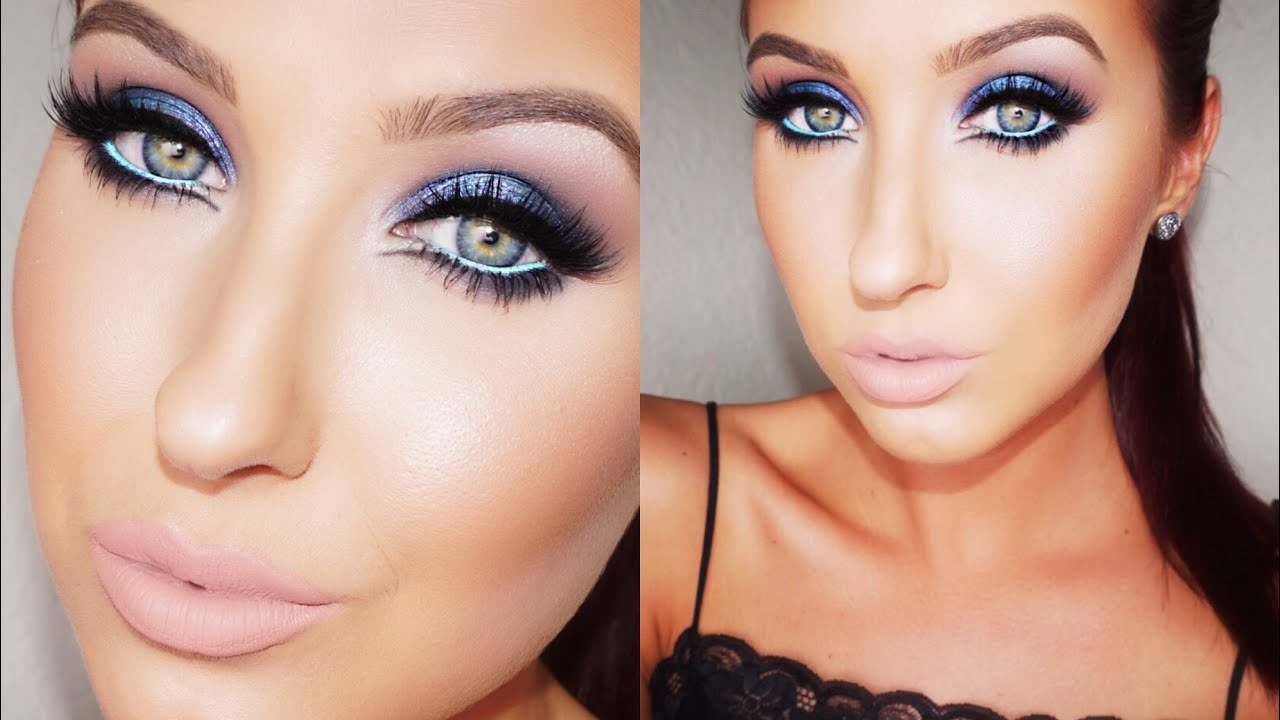


For those of you that don't know, this is Jaclyn Hill. She is so gorgeous and talented. Her videos are fun to watch and at the same time really easy to follow and learn from. Go watch her right now if you haven't already. You can thank me later. 
For now this is a bit much for me and quite frankly I don't have the skills/product to create it so I'll be working up to it. 


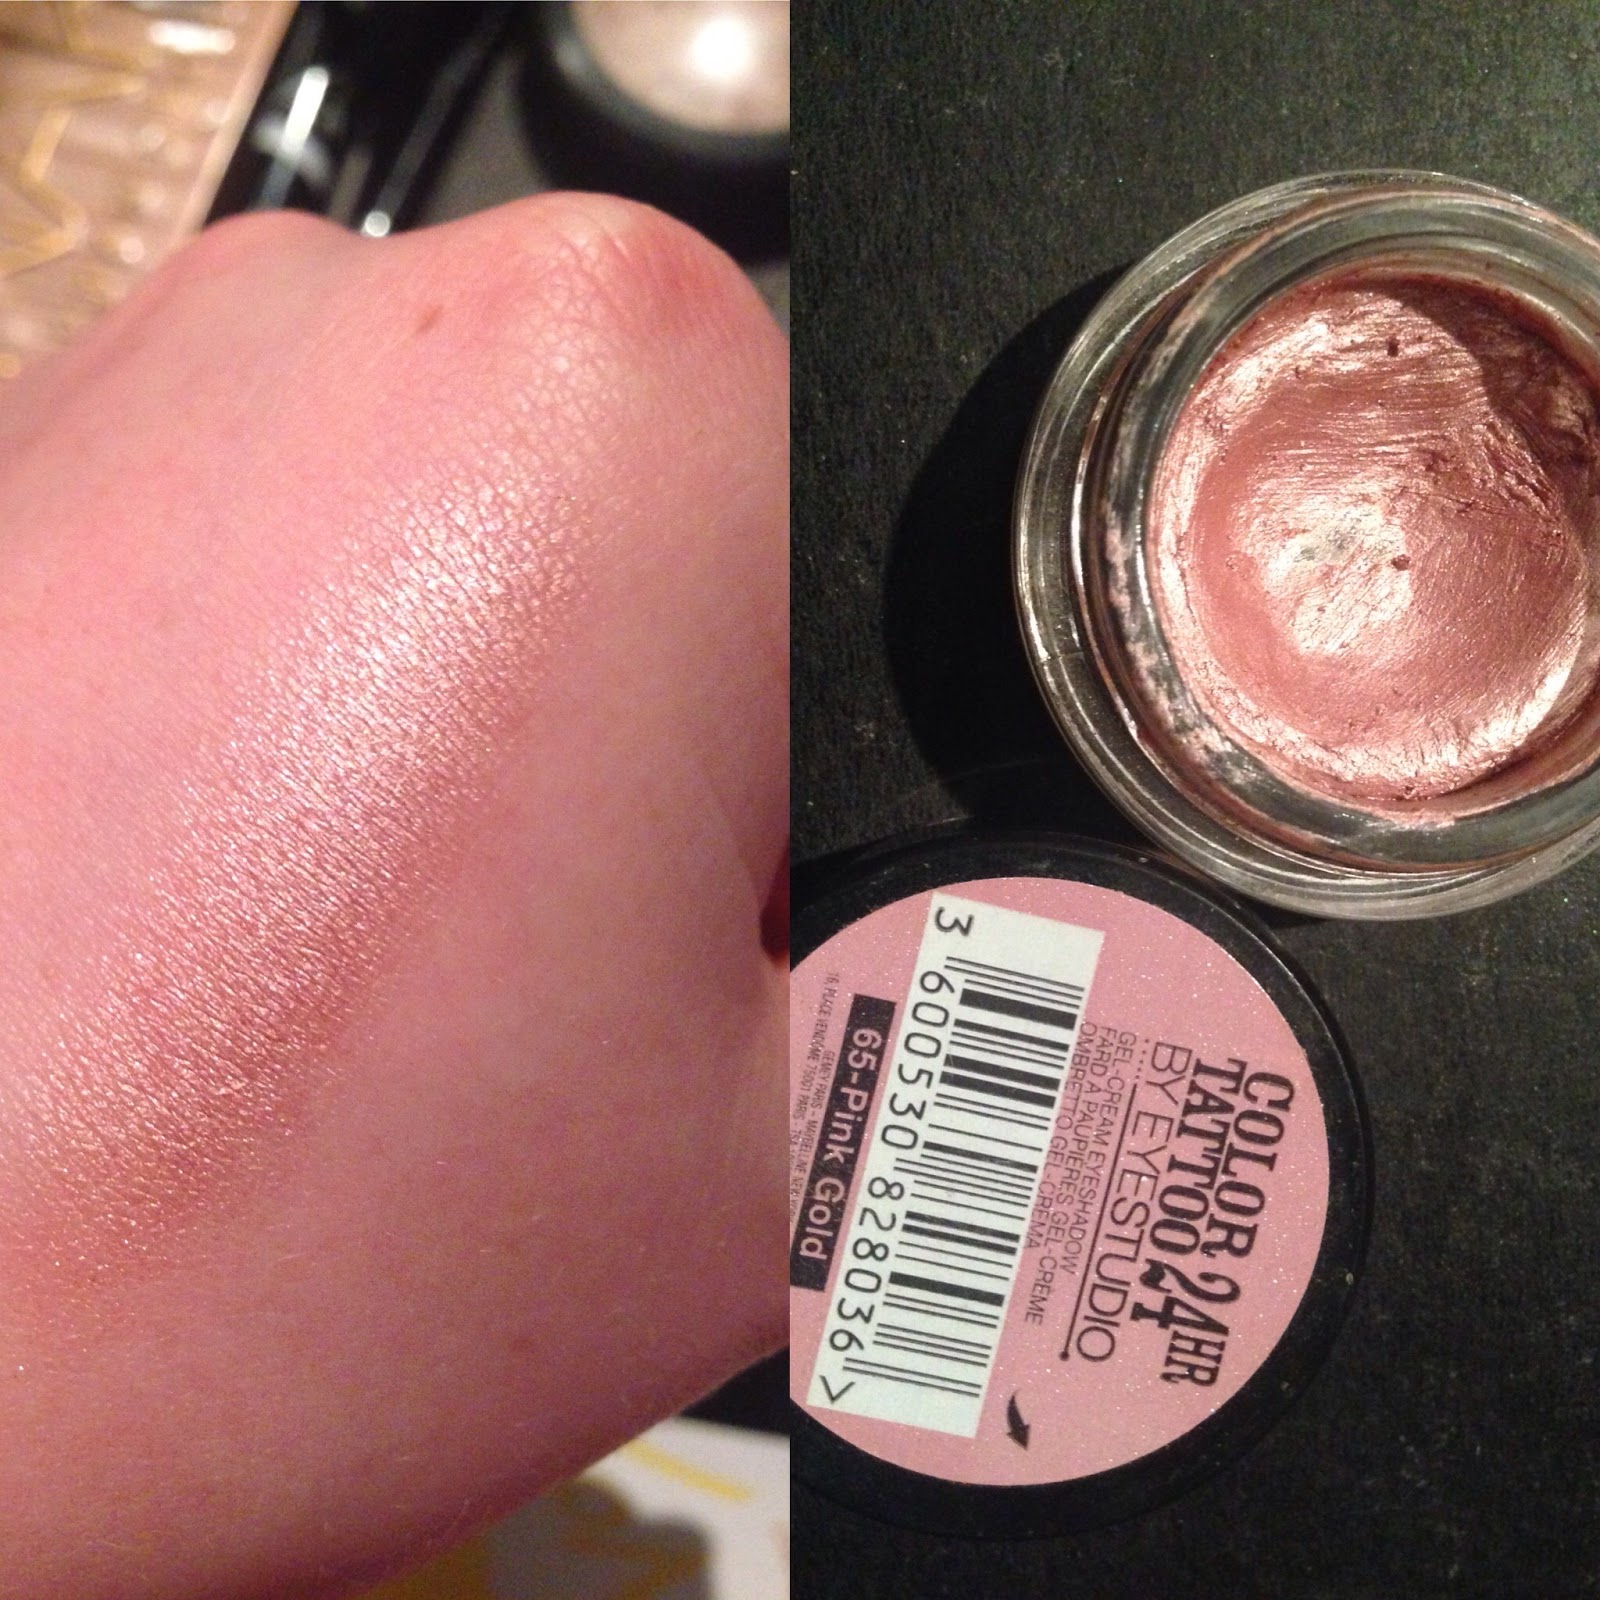
So for this look I began by priming my eyes with Urban Decay Primer Potion. I then covered my lid in Maybelline Colour Tattoo in Pink Gold.

This gives a really nice colour on it's own and it also works fab as a base for other shadows. I use this colour all the time. the formula of the colour tattoo shadows is fantastic. They are just as good as MAC Paintpots and literally half the price. Using my MAC 217 I fanned Makeup Geek Unexpected

into the crease as a transition shade, deepening the colour and blending out the cream shadow from earlier. Be careful not to take this colour too high as it can be a little difficult to blend. I then wet a flat, dense shader brush with MAC Fix+ and patted the shade trick from my Urban Decay Naked 3


palette along the bottom of my lid. This shadow is full of really chunky glitter and it's the most divine gold! Using it wet really foils the shadow on the lid and keeps it shimmering and catching the light all day long. This was where I had actually planned to stop but I really wasn't happy with the way unexpected was sitting in and above my crease so I decided to add a little more definition to the look. On my Real Techniques Silicone Liner brush I took Factory, again from the Naked 3 palette and placed it in the outer corner of the eye running it in to about half way through the crease.

If your brushes are a little bigger and you find it hard to get that really precise placement of shadows around the eye and especially into the crease, this is a really great way to achieve that. I then used the Inglot 10s brush to blend that using windshield wiper motions as I really wanted to concentrate this colour right into the crease rather than spreading it around above the crease. I also wanted to graduate the colour into the inner half of the crease in a sort of ombre effect. 
As usual I then left my eyes and moved on to the face. I didn't have a huge amount of fallout from the shadows but I really wanted to keep the shadows in a slight wing shape at the outer corner so I folded a cotton pad in half and using Garnier Micellar Water I cleaned off the shadow that didn't fit the bill. 

At the moment I'm running out of my Smashbox Liquid Halo Foundation, which I love, but rather than take the easy road and repurchase this, I'm trying to find something bigger and better. Currently I'm trying out Dior Starskin but the shade I've got my tester in which is 010 I think, is a little light for my skin at the moment. For this look I mixed in a small amount of my MAC StudioFix Foundation in NC25 to darken it up a tad and I also added in a tiny amount of Nars Illuminator in Orgasm. I find the pinky orange shade of this highlight really works well with more tanned skin than if I'm using a lighter foundation in the winter months. I find it to be too warm toned for paler days. I then applied all this with my trusty friend, my Sephora Sculpting Sponge. My sponge has seen better days at this point, having been using it for the best part of 3 months. It's so fantastic though I'll keep using it until I have the opportunity to invest in another, (or it quits on grounds of overwork). My skins been a bit odd lately and has decided to erupt on my chin area. I've one or two really stubborn under the skin spots and the makeup refuses to conceal them. Even the industrial strength warpaint, Collection 2000 Lasting Perfection Concealer can't do it. But on the plus side my skins been less oily, which means I need less powder, which means I get to be more glowy and dewy which has been a welcome development in my book. 

Because I'm not using as much powder I'm bronzing with a powder right away. If I had chosen to go in with my Maybelline Fit Me Stick today my face would have been considerably oilier. Although the colour pay off in those is absolutely brilliant they're quite greasy and in work it can get quite hot so I like to keep those for cooler days. Needless to say mine won't be coming on holidays this year. I really don't feel they would hold up in the heat and humidity. Using a Fluffy Flat Eye Brush, I scuplted out the cheekbone with my Benefit Hoola. I also brought it down the sides of the nose, along the top of the forehead, into the temples and under the bottom lip. Using a fan brush I dusted MAC Soft and Gentle along the tops of the cheekbones, down the centre of the nose and out in a fan at the top and into the cupids bow. I blended all of this out again with the damp sponge. 

I then lined my upper lashline using my Maybelline Master Graphic Liner and also lined my upper waterline with a black pencil liner. I brought both unexpected and trick, two of the shades I used earlier under my eye. You could bring any of the colours you've used on your eye underneath but I chose to stick with the lighter colours as this look was for daywear. I coated my lashes in Urban Decay Supercurl Mascara and applied Eye Candy Lashes in 001.

I picked mine up from TK Maxx for €3.99. These are a steal at that price! I've used mine 3 times now and they're still perfect! I outlined and filled in my brows using my Rimmel brow pencil in Hazel and L'oreal Brow Artist Brow Plumper. I'll be posting a full post on brows soon. 

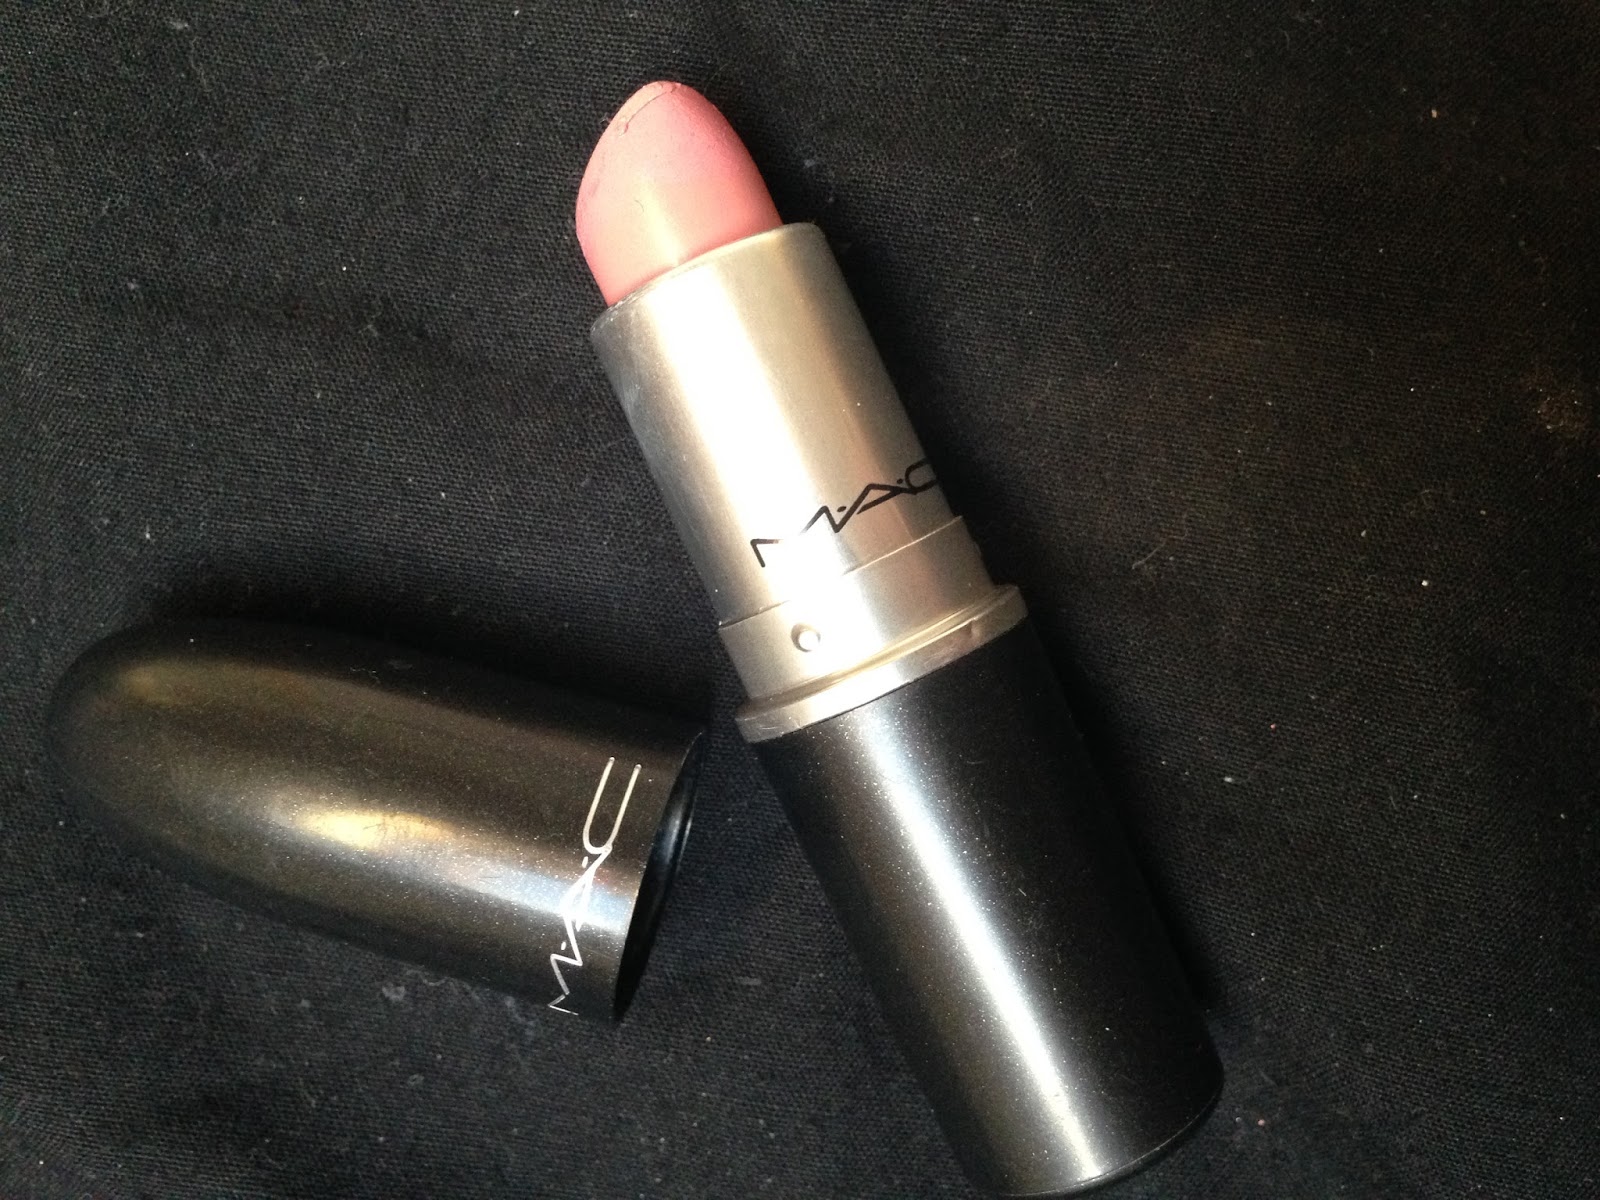
I finished the look by applying MAC Supreme Sheen Lipstick in Pleasurefruit


I love this look and the eyes lasted without budging all day. 

If you'd like to see a mini review on the different foundations I've been trying out let me know on the facebook page and I'll be delighted.
As always if you recreate this look tag me on twitter, facebook and now instagram @kate_mray

Wednesday, 27 May 2015

Look of the day

Here's the look I went for today. I went for dinner with family so I wanted to look put together but I had some errands to run first and I didn't want to look completely overdone. I went for a really simple face and lip and then I really pushed it with my eyes.


As usual I started with the eye. I primed my lid from lashline to browbone with MAC Pro Longwear Painpot in Soft Ochre.


I then covered the lid in MakeUp Geek Shadow in Unexpected.

I applied Urban Decay Buck into the crease as a transition shade before with a small brush applying Makeup Geek Shadow in Burlesque

into the outer corner of the eye in a v shape. Using my MAC 217 brush I then swept a black shimmer shade from Soap and Glory

into the crease to darken the look. I depotted this from a palette so I don't know the name of the shade. When I was done I applied a small amount of MAC Naked Lunch under the browbone. You can see this in the picture directly above the black shadow.

There was a little bit of fall-out so before I primed my face using NARS Pore Refining Primer, I did need to clean up a little using my Garnier Micellar Water. I mixed a small amount of my Smashbox Liquid Halo HD Foundation in Shade 1 with my MAC Studio Fix Liquid Foundation in NC25.

I also added in a little bit of NARS Liquid Illuminator in Orgasm.


If I really want to sculpt out the face I like to cream contour. I have a few steps to this. Firstly I'll conceal under my eyes using my Inglot AMC Concealer in Shade 64.

I'll then take my Benefit Watts Up across my cheekbones and out in a fan between my eyebrows up to the forehead. I have slightly oily skin lately so I don't like to take the shimmer highlight anywhere else on my face. I'll sculpt out underneath the cheekbones, into the temple, down the side of the nose, the jawline and under the bottom lip with my Maybelline Fit Me Stick in Soft Honey,


Then anywhere I haven't put light or dark I'll fill in with MAC Prep and Prime Highlight Pen in Radiant Rose.


I then blend everything together using my Damp Sephora Sculpting Sponge. Don't forget to blend the contour along your jawline down onto your neck or you'll end up with a serious line.

At this point I'l start using my powder products. Once I switch to powder products there will be no more cream products applied to my face. Applying creams after you apply powder causes makeup to separate and just look generally patchy.

Using my damp sponge I'll be setting anywhere I would usually get shiny using Rimmel Stay Matte Pressed Powder in Translucent. For me this is down my nose,  on my chin and I also use it to set my undereye concealer.


In order to really sculpt out that contour I'll go over the dark areas with Benefit Hoola and along my cheekbones with MAC Soft and Gentle. Blend, Blend, Blend. Blend until your hands hurt.


I lined my upper lashline using Maybelline Master Graphic Liner and my upper water line using a basic black pencil liner. I lined my bottom waterline using NYX Wonder Pencil in Medium. This is available from Sam McCauley Pharmacies. I applied MakeUp Geek in Unexpected on the outer half of the lower lashline and Urban Decay Buck on the inner half before applying Smashbox Full Exposure Mascara all over my top and bottom lashes.


I swept MAC Blush in Fleur Power across the apples of my cheeks. I finished the look by applying MAC lipstick in Creme Cup all over my lips and spritzing MAC Fix+ all over the face. This gives a really dewy finish to the face.


Heres the finished look.


Tuesday, 19 May 2015

Desk to Dancefloor

This is going to be my first video post so please excuse the quality. This is one of my go-to daytime looks and I'll be posting Part 2 very soon, detailing how to transform it to this

in just a few simple steps. 
Let me know if you prefer the video format in the comments below or if you'd prefer to stick to standard blogging. 


If you recreate this look don't forget to post it to the facebook page: https://www.facebook.com/queenoftartanblog

and tag me on twitter: https://twitter.com/KateMRay

Kate xxx. 

Wednesday, 16 April 2014

How Cruelty Free is Your Makeup Bag?

Its obvious to anyone that knows me, that I am totally and utterly addicted to all things makeup. What is often not as obvious is that there are some issues I feel strongly about when it comes to makeup products I will use. Over the years, in the process of brands testing their products before placing them on the market, many animals have been subject to what can only be described as torture.

Living in Ireland, a member of the European union, bound by EU law, there is zero tolerance for animal testing. An EU directive provides the framework for the phasing out of animal testing for cosmetic purposes. It is prohibited to test finished products on animals, and prohibited to market in the EU, finished cosmetic products and their ingredients which were tested on animals. The testing ban has been in place since 2004 and the marketing ban since 2009. 

I am no political activist but it seems ridiculous to me that in 2014, when Europe can find alternative methods of testing cosmetics that larger, more powerful countries such as the US cannot make more of an effort to put an end to animal testing. The US are by no means the biggest culprit when it comes to this issue, having outlawed the testing of cosmetics on mammals. In China, local laws require animal testing on cosmetic products to demonstrate consumer safety as part of the product registration process. This is a mandatory legal requirement applicable to all cosmetic products sold in china. This has caused many large cosmetic companies such as Urban Decay not to enter the Chinese market despite it being potentially highly lucrative.

Urban Decay is just one company out of many to be awarded the ‘leaping bunny’ logo.


If you see the ‘leaping bunny’ on a cosmetic or website, you can be confident in the fact that the company has committed to the Corporate Standard of Compassion for Animals, a voluntary pledge that companies make not to test on animals during any stage of product development. The ingredient suppliers make the same pledge and the result is a product which is 100% free from animal testing.

Urban Decay, which has recently been bought out by L’Oreal, made the following statement via email:

"We are under new ownership but they basically only own us. We still use the same animal and cruelty free companies we use to make our products. We hope to lead the way for L’Oreal and show them they do not need to test on any animals."

L’Oreal claim to no longer test any of its products or ingredients on animals, but as is the case with so many companies I emailed, they do make the exception if regulatory authorities demand they do so. This basically means that when they sell in places like China, they do allow the testing of their products on animals. Many companies sent me full details of their animal testing policy and the mention of this exception was always buried somewhere mid-paragraph. It seemed to me that most companies were aware that what they were doing would make people unhappy and they were doing their best to hide it.
When I sent emails to companies I always asked specifically if they sold in Countries such as China, where animal testing is mandatory, and though I found that many companies were attempting to hide their involvement in the Chinese market, most were willing to disclose it.

Real Techniques emailed me to say that their brushes are 100% synthetic, so they are all cruelty free. They did however choose not to comment on whether they sell in markets where animal testing is mandatory. Benefit told me that they have not been carrying out animal testing since long before the ban came into effect in 2004. They also did not comment on whether they sell their products in the Chinese market.

Boots provided the following statement:

“Boots and its subsidiary businesses do not test any products or ingredients on animals, and do not commission others to do so on our behalf. In fact in March 2013 it became illegal for any company to test cosmetic products or ingredients on animals in Europe.  We realise that until satisfactory replacements are available, other businesses around the world will carry out some tests for their own particular products and ingredients to meet regulatory requirements.  These safety tests may sometimes involve ingredients of the type used in products which we manufacture and sell.”

I started off by going through my makeup and emailed all of the companies. From the statements they sent me I made this little table. When I started the research for this post I thought it would be really easy to find products that are ethical. It's actually a lot harder. A lot of brands will put the profits they can gain ahead of the welfare of the animals they are testing their products on. From now on I will be trying my very best not to buy products which have possibly been animal tested. Please let me know in the comments below if you have any questions or if there are any brands you would like checked out.

Brands 100% free from animal testing
Brands not free from animal testing
NO.7
Rimmel
Urban Decay
Sleek
Philosophy
Real Techniques
Body Shop
MaxFactor

MAC

Bobbi Brown

Maybelline

Lancome


I was unclear when it came to certain companies such as Benefit and Bourjois, so I felt it best to leave them out of the running altogether, rather than give false/misleading information. All of these companies would be required not to perform animal testing within the EU but if they sell their products in the Chinese market I included them in the Not Cruelty Free bracket. 

Saturday, 1 March 2014

LFW Makeup Trends


Last week at London Fashion Week we said goodbye to some of our old reliables and said hello to some new, unique beauty trends for AW/14. Although the fashion world may be having a better time of it I am still waiting for the Summer here in Ireland so I've taken the time to pick out some of the key trends for SS/14. 


Some of the stronger trends such as the cat-eye flick and the metallic colour pallette are still hanging around though to ring in the summer.
A really prominent trend at LFW was the power lip, ranging from pastel colours and bright pops of orange to the light berry lip we saw gracing the runway during the Charles Anastase show.


I love a dark lip in the Winter season but I'm not sure about how well this will fare during the transition into Summer months. Maybe this trend will be wearable in Ireland where it is cold enough year around to make cheeks flushed and lips red, but somehow I think those of us holidaying in warmer climates won't be sporting the berry lip on the promenade. 


A much more wearable trend is the orange lip seen at the DKNY show. Orange lips are surprisingly flattering on almost every skin tone. Makeup Artist, Charlotte Willer used affordable high-street brand Maybelline to create the look. She mixed Maybelline Colour Sensational Vivids Lipstick in Electric Orange and Neon Red. 


The trick when choosing an orange lipstick for paler girls is to choose a lipstick with a red hue rather than yellow. In order to demonstrate how easy the trend is to pull off I attempted the look this morning. 


I used Mac in Lady Danger and mixed it with Mac in Russian Red because Lady Danger has a yellow base. I kept the rest of my face simple to emphasise the strong lip. 

Designer, J. JS Lee also featured a bright fuschia tone lip, similar to MAC in Pleasurefruit. I was never a huge fan of lip gloss as I find the majority to be sticky and unpleasant to wear and I am pleased to report that gloss has largely gone by the wayside for the Summer Season. Edging into its place is a matte lip. This look can be achieved by blotting lipstick and then dusting lightly with a translucent powder through a tissue.


Another strong trend to emerge this year was blue-tone eyeshadow. I am of the opinion that blue eyeshadow isn't the most flattering but I can just about tolerate a lavender eye similar to that seen at the Holly Fulton show.

Makeup artist Andrew Gallimore applied this lilac colour from just above the lashline to the brow bone, and while this looks stunning on the runway I don't think I will see it gracing the streets of Ireland any time soon. I created a similar, more wearable look today using the No.7 Neutral Radiance Eye Palette and the Urban Decay Bamboo Palette. 

No.7 Neutral Radiance

 I used the Blue-Lilac colour in the upper left hand corner of the No.7 pallette all over the eyelid to create a base. I then used the copper-pink colour you see underneath to contour the outer part of my eye-socket to create depth. 


 I then applied VZI by Urban Decay in the inner corner of my eye to really make the pinks and purples pop. I then blended them as far towards my browbone as I was comfortable with to stay in keeping with the trend. I ran the blue-lilac colour under the outer corner of my eye with an angled brush in order to also tie in the Ephereal look we saw grace the catwalk of one of my favourite designers, Julien MacDonald. Cheekbones were highlighted and faces were kept simple to emphasise the otherworldlyness of the models. The look took some getting used to and I did have a few double takes when I passed the mirror throughout the day, but I must admit it did grow on me. This is probably as blue as I would go with my eyeshadow but I would never say never. There was once a time when I hated tartan.


  Another way of wearing the blue eyeshadow trend was shown at the David Koma Show where the models eye was first covered with a gold eyeshadow as a base, similar to the Bourjois Shimmering Shine Liquid Eyeshadow in Molecule D'or that I frequently use. The outer half of the lid was thickly lined with a navy eyeliner. Navy really brings out the colour of the eyes. This is another really wearable way to go with it.
The gold eyeshadow used in the David Koma show tied neatly into another trend to feature heavily in the coming season, metallic glitter eyeshadows. I find Urban Decay to be very reliable for glittery eyeshadows and if applied with their Eye Primer Potion the eyeshadows don’t have much fallout.

Thick flicks of eyeliner were also seen at the Sister by Sibling show and the Topshop show and it looks like this trend is here to stay. I am not a huge fan of this trend but it is largely down to my own ineptness. Liquid eyeliner and I are not a good match and no matter how I try I just cannot create the cat-eye flick I so crave. 
Topshop went for a bold eye look. Models sported a messy eyeliner both on the lid and on the waterline under the eye. They themed their makeup “Beach Party” and it certainly did smack of Oxegen. 


The models had bronzed skin and grungy hair and eye makeup. Although a fairly natural and non-preened look it was drastically different from the pretty, natural faces we saw grace the runway at the Temperley show. The soft sheer makeup was beautiful and really made the models look fresh as a daisy. Minimal makeup is easy to pair with a pastel lip and a white tone eyeshadow in the summer. I would recommend using a tinted moisturiser or BB cream to create this look.


One of my favourite reveals at LFW is that freckles are back! Being Irish I do have an abundance of freckles and a tendency to want to hide them. At the Paul Smith show the makeup artists actually drew freckles across the models’ cheeks and nose using an eyebrow pencil. Backstage at Charles Anastase each girl was given a beauty spot under her left eye because imperfections are beautiful. The natural and real nature of the catwalks really struck me this year and it is a trend I truly adore.


Despite this many models sported bronzed skin and although for the last few seasons pale skin has been in, it appears tan is back. When Topshop Models weren’t sporting their grungy beach look they were instead bronzed babes showing off a bright red/orange lip.


Big lashes seem to be in this season and not just on the top lid. The Makeup Artist at the Jean Pierre Braganza show applied false lashes to both top and bottom lids of the girls before sending them down the runway. 

Mulberry perhaps showed the prettiest faces at  LFW, although they did seem to go very heavy on the mascara. I’m not sure spider lashes will ever be “in”. 
 What do you think of the trends at LFW? Will you be sporting any of them in the months to come? Let me know in the comments below.


Wednesday, 26 February 2014

All Time MakeUp Favourites

These are what I consider to be the best of the best of my makeup collection. Compiling this list was no easy feat. Do you know how much makeup it is possible to love?  In my case rather a lot. I've done the best I can to whittle it down to one or two from every category. So here goes.

Lipstick

Daywear
Winner: MaxFactor Colour Perfection in Ultrasuede (Discontinued)
Runner Up: Rimmel Lasting Finish by Kate in 03 (Boots, €6.99)

For daywear I have used MaxFactor Colour Perfection in Ultrasuede for a long time but this line of lipsticks have been discontinued and I can't quite seem to find something the same.
When this runs out I will probably use my Rimmel Lasting Finish by Kate in 03 but it's not the same.
On the top is the Rimmel 03 and and on the bottom is Ultrasuede.

Nightwear
Winner: Rimmel Lasting Finish by Kate in 01 (Boots, €6.99)
Runner Up: No.7 High Shine Lip Crayon in Berry (Boots, €11.75)


These are really great affordable lipsticks, but I do usually need a lipiner under this deep red colour to stop it from moving. I use my No.7 Precision Lips Pencil in Fire.

This lipliner also works with my MAC Russian Red and Miss Sporty Perfect Colour in Dream.
On the top is a swatch of the Rimmel in 01 and on the bottom you can see the colour of the liner.

Close behind but not quite there is my No.7 High Shine Lip Crayon in Berry. This does not quite have the depth in colour that I would need it to if it were to be my favourite. You  can see more information on this product in my Make Up Haul Blog Post

Eyeliner

Winner: Mac Dupe Eye/Lip liner with aloe vera & vitamin E
Runner Up:Maybelline New York EyeStudio Lasting Drama Gel Liner in 01 Black (Boots, €11.99)

My favourite eyeliner of the moment is a MAC dupe which I acquired some time back. I'm not sure where exactly I got it from but I am aware that it is not a genuine MAC eyeliner.
Although I am aware that it is a fake, that doesn't stop it being a quality eye pencil. It lasts and doesn't move if I wear it all day, and it doesn't irritate my eyes like a lot of other liners do. 

I have had Maybelline New York EyeStudio Lasting Drama Gel Liner in 01 Black since it first came out in 2010 and I'm still not even close to running out. 

I realise that makeup goes off but I haven't had any problems yet and I can't afford to be throwing out makeup willy nilly. 
This liner is much darker and thicker than a pencil and I only really use it for going out at night. I think it would be too much for daywear. I don't rate the brush that comes with it and prefer to use my Louise Walsh Angled Eye Brush to apply the gel. 

Mascara

Winner: Estée Lauder Magnascopic Maximum Volume Mascara (Debenhams, €25)
Runner Up: Mac Zoomlash (Brown Thomas, €18)

I don't own either of my favourite mascaras at the moment as I love trying out new brands and I have lots of other mascaras at the moment to use but none of them measure up to these. 

Estée Lauder Magnascopic Maximum Volume Mascara is the best mascara I have ever used. It creates full voluminous lashes without causing spider legs. I cannot rate this highly enough and I can't wait to repurchase it. 


Mascara is one of the places in my makeup bag that I won't hesitate to spend money because where I'm concerned you get what you pay for. The only problem with MAC Zoomlash for me is that, at the beginning of the bottle before you use it for a while, too much comes out on the brush and it is so easy to end up with spider legs. Once you use it a bit, it evens out and it is much easier to use. 

Blush

Winner: Nars in Orgasm (www.brownthomas.ie, €29)
Runner Up: Sephora Dupe (Not Available in Ireland)

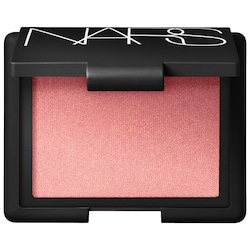
My favourite blush is Nars in Orgasm 

but as this is not readily available to me in Ireland, when I ran out I never repurchased it. While on holiday in France two years ago I found a gem in a Sephora store. 

This set comes as six shelves, each with 4 shadows, 2 lipglosses and a blush and each shelf has a colour scheme, green, brown, blue, pink, purple and black. These shelves all slot into a drawer unit which also comes with a hollow compact to slot your favourite shelf into when you are on the go.
In the green shelf there is a blush which is very similar to the Nars blush I love so much.

As you can see it is almost gone and then I will be on the hunt for a new blush. If you have any suggestions please leave them in the comments below.

Bronzer

Winner: Strictly Come Dancing Bronzing Set (Discontinued) 
Runner Up: Benefit Hoola (Boots, €34)

Last year after Christmas I picked up a Strictly Come Dancing Bronzing Set in the Boots sale for less than €15 and little did I know what a gem I had acquired. 

The bronzer has three shades in it, a shimmery white, a shimmery beige and a darker brown colour. I used the white alone as a highlighter, with the beige for a daytime bronzer and mixed all three together for a night bronzer. Unfortunately mine has broken and I can't find anywhere to repurchase this. 

I like Benefit Hoola but I find Benefit's products to be very overpriced and it kills me to repurchase them. Recently a friend of mine gave me the Sleek Face Contour Kit in light. 

The bronzer in this is quite similar to Hoola and much more reasonably priced. I will definitely repurchase this. 

Brows

Winner: Rimmel London Professional Eyebrow Pencil in Hazel (Boots, €4.75)

 I like the Rimmel London Professional Eyebrow Pencil in Hazel because it works just fine and is as cheap as chips. 10/10 in my book. Will definitely repurchase. 

Concealer

Winner: Benefit Boiing in 02 (Boots, €24.00)
Runner Up: No.7 Match Made Concealer in Cool Ivory (Boots, €9.75)
This is one of the few Benefit products that I rate at all. The concealer is brilliant!  It really is industrial strength. Usually I will use it only at night but on the odd occasion if I am having a particularly bad skin day I will pop it on with my regular daytime foundation and it does the job. I am on my second tub of this and I will definitely repurchase. 


At the moment I am down to the last bit of my No.7 Stay Perfect Blemish Cover in Medium. I have already repurchased but what I didn't realise when I was in the store is that they have rearranged the line and now No.7 Match Made Concealer comes in the same shades as the No.7 Stay Perfect Foundation. This suits me perfectly as I now own the matching concealer and foundation in the shade Cool Ivory. The reason this concealer is not my winner is that it just doesn't have the same coverage as the Boiing but on a normal day it does just fine. 

Powder

Winner: Rimmel London Stay Matte Pressed Powder in Translucent (Boots, €5.99)
Runner Up: No.7 Perfect Light Pressed Powder in Light (Boots, €14.95)

I don't really have a problem with oily skin so I don't have a huge grá for powder. I use it most of the time to be safe but the only time I really need it is in the Summer when I'm away in a hot climate. I find Rimmel London Stay Matte Long Lasting Pressed Powder in Translucent does the trick for me at home. I've never taken it away with me to comment on it but if I'm still using it in the summer I will find out then. I have used this before and recently repurchased it. I have also turned other people onto it and they've been happy with the results. 

I also really like the No.7 Perfect Light Pressed Powder in light. 

It does the same job for me as its Rimmel counterpart and I just don't really feel like paying the difference. 

Bases

Winner: MAC Mineralize Satinfinish SPF15 Foundation in NC25 (Discontinued)
Runner Up: Rimmel London BB Cream 9in1 (Boots, €8.95)

My favourite foundation is MAC Mineralize Satinfinish SPF15 Foundation in NC25. It gives a lovely even coverage with a nice glow. I am almost out of it at the moment but it makes me want to cry that it has been discontinued. 

Recently while trawling through Boots in Limerick's Crescent Shopping Center I came across what I think is a real gem, Rimmel London BB Cream. I wrote more about this in my Make Up Haul Blog Post

Palettes

Winner: Urban Decay Naked Palette (Debenhams, €44)

There is only one real winner where I am concerned when it comes to Palettes and there standing above the crowd is the Urban Decay Naked Palette. Admittedly it is expensive but in my opinion, worth every penny. I have used every colour in it some stage, some more than others, and I love it. Recently I have been forcing myself to use other products when I am doing my eye makeup. 

Tools

Winner: No.7 Eyeshadow Blend and Contour Brush (Boots, €9.50)
Runner Up: Real Techniques Buffing Brush (Available in Core Collections set €28.99)
I absolutely adore this brush. I bought it with a voucher as an impulse buy in Boots so it cost around €5, which is an absolute bargain. I don't use it to apply my contour eyeshadow as I use an angled eyeshadow brush for that but I always use it to blend my shadows after I put them on. As far as I am concerned EVERYONE needs this brush.  


I bought this brush in Boots and fell instantly in love with it. I wrote more about this brush in my Make Up Haul Blog Post

Highlighter

Winner: Benefit Watts Up (Boots, €35)
Runner Up: Sleek Face Contour Kit in Light (www.sleekmakeup.com €7.99)

I really like the pearly dewy look this highlighter gives. I usually apply it on the cheekbones, down the center of the nose, on the brow bone and on the cupid's bow. It is a tad pricey so I try to save it for night time and use my Sleek Face Contour Kit for daywear. 


So those are my makeup favourites. Do you have any that I've missed or maybe we have some of the same favourites. Please let me know in the comments below. My next post will be addressing the makeup trends for spring which emerged at LFW.